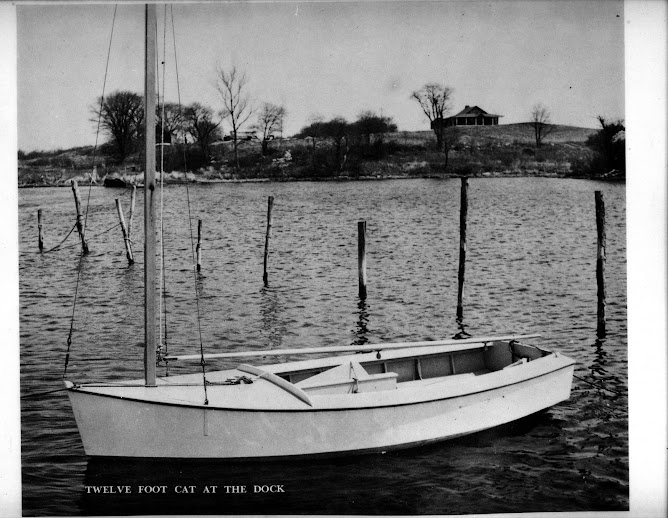
Follow me as I build a 12 foot catboat from plywood and pine. The boat was designed by Edson Schock in the 1940's. This is a project born of a desire to have another boat to sail here in Puerto Rico that will stand-up to the Trade winds. The sail plan will be changed to a gaff rigged sail. All the lumber is locally bought and pine will be substituted for oak, which is not readily available here. Marine plywood will be used.
My hardware arrived today and I want to get teh centerboard box in place asap. I glued, screwed and bolted the centerboard box together this afternoon so I can prepare to mount it tomorrow.
With the headledges screwed and glued in place, it is time ti get the inside of the CB Box painted before I assemble the 2 sides together.
I am using an Anti-fouling paint that contains Cuprous oxide or copper powder suspended in the paint. It is a heavy can and the copper will discourage marine life from growing onto a surface, copper being toxic to most living things.
The paint requires almost constant stirring to ensure the copper remains suspended in the paint.
It goes on thick and I have taped off the area where the other headledge gets glued so that the surface remains clean.
I began gluing and screwing parts of the centerboard box today. I went slowly to get it right. I piloted holes for some 16 or so silicone bronze wood screws tro hold the side panels and bedlogs together.
I understand tat you should no countersink plywood but there are times when it cannot be avoided and this is one of those times.
I mixed a batch of glue, slathered it on to the 2x6 and waxed the screws, sinking them by hand with the bit brace.
It turned out right and tomorrow I will do the other side!
I love power planers! What a time saver it was. In a half hour, I trimmed her down to the lines that I took off the keel curvature.
I had about 1-1/2" to remove in the forward part and 3/4" of wood to removed in the back and what would have taken me at least 4 hours was accomplished in 30 minutes!
I cut 2 pieces of marine plywood and cut 2 pieces of 2 x 6 and added two 1 x 2-1/2" pieces of pine to form the centerboard box. The 1 x 2-1/2" pine go on either end to provide a space to fit the pivoting centerboard in.
The plywood panels assembled with the pine end pieces.
Cutting the 2 x 6's
After checking for the initial fit of the pine board to the plywood, I added the 2 x 6's to the form to complete the mock up for fitting into the slot I had cut into the keel.
I had already removed frames 5, 6 & 7 in order to be able to lift and place the keel box. I had chiseled and rasped the openings to widen and square them a little more to get the right fit.
Placing my hydraulic lift under the center of the box, I lifted it into position, plumb with the face of frame #4.
This is not the final position but serves to illustrate the concept about how I will now transfer a parallel curved line of the keel to the sides of the 2 x 6's to allow a nice watertight fit against the keel. I will shave that down with the power planer.
The centerboard is lowered when the sail is raised. It is a piece of wood that project 2-3 feet below the bottom of the boat and is there to resist the force of the wind from pushing the boat sideways. Sort of like the tail on an airplane, it helps track the boat forward.
I have made a 3/4" wide opening along the center line of the keel. This will be the first step in the construction of a "box" to contain it when it is in an upright position.
It was a fairly easy operation. Drawing the limits out in pencil, I plunged my circular saw into the wood and cut it from one end to the other.
I finished the cut with my hand saw then used my saber saw to cut the ends.
![[image]](https://lh3.googleusercontent.com/blogger_img_proxy/AEn0k_sU1T7ChGHFn5RVCHofwe59-RqkQ2XpBy1Us16z9MTZYChJZYp4hnXixHt4vGhQw5yitltoz6bid0XF06VPOkIVm0dn7p4fRh5S3mFoq6EgOY40VGyoKMljltaGWcjJKApKpCsqg1HZhTH4w8IFJIT3=s0-d)
![[image]](https://lh3.googleusercontent.com/blogger_img_proxy/AEn0k_tuDt_NEg8QWDoHZ4A078F6uE0kOw-Z9_Hmk_o8EehC34cBj-EjMdiwVAk1etS2hC0mZd0LYp9YnbSGycnhP8G5GFeTzVzH-WuWEp8xu6YDD2qZ7Jv_evYRI132PIUYTk55oZGtf1ckY-5J4MUrIg=s0-d)
![[image]](https://lh3.googleusercontent.com/blogger_img_proxy/AEn0k_uIF2htUgqPa7OqgZk17moeTDATttzfgrQdGr61KczOu-cqFa_LyjTMNt33pWZftxXI19r_Qf7kUxb3lQu1xQDiAP6zpF8JmBlUg8EXQ_q_ebmcQCH8VJXzFcEk6ChzVaN8L_7YCA6oqPJEeJNW__Dt=s0-d)
![[image]](https://lh3.googleusercontent.com/blogger_img_proxy/AEn0k_sGjs1tKeourqVxLautVuaX9jIJBxEj2TVJQE_amioKeAUggO_Vd_NrWyQh8xkt60Zzgynp2_UDy4pL387zaMfsX5sDx0Ydo-1Ban5Fp2PXCPNyUBZsctyLCVuEUWTC-XpEour6trthFqnHOnbkbqjM=s0-d)
![[image]](https://lh3.googleusercontent.com/blogger_img_proxy/AEn0k_vUnXRHZSw4JS2fq7Dtdfwkg7_Hy_Tz09Lnx2B26dNzcdj7OYPDKy59zM1XHKnnljFd6PDyCtaj-hKlAL8U8TK6XLy5txcKLraI76YTP8XK1HtBRsU7UrpkZtjyM02r8nZFtIcDCQLUwUuET6r0EUht=s0-d)
![[image]](https://lh3.googleusercontent.com/blogger_img_proxy/AEn0k_u6dPtc1JfP1nbVP84QU1aI-AehM1QsNJfHvmqOKP01cj_J8oHQnzwtNAEJL0f6t3T9fH1Z2_hqch-P_APzVpDbHttU3LLQEQaVUZlBlMCW7y-Jmw2YVruN1DLbWMThxsllLhQZPYGo0xYH2clCFg=s0-d)
![[image]](https://lh3.googleusercontent.com/blogger_img_proxy/AEn0k_uinnK-l2Xd9lUeZpVEkH3JHixmWbIEFfJ7HwuDJfD6lLy6bmRheoToG7-jcadjaXc95cdkk5JN4xtWd6Yv3eLLj7txDOB41Y6w2FuDKZ97Ht4fWGn6kKGskVgtiM-Zw6fTp_t-oOYHkW9N_dnQ=s0-d)
![[image]](https://lh3.googleusercontent.com/blogger_img_proxy/AEn0k_uJw5w9bVjarHpz8jTOM5gVaHVUHSaFGdObPzj-XIAI5aZRAAUu1-g8NiRf9EZWh5uPCdSJSXAiHBe4M2QgcYXmHQpgIJU5gC856acUq016MItG25_TOKkQKR_gXk_DoflABQuQnv-Lzbm-7dOy=s0-d)
![[image]](https://lh3.googleusercontent.com/blogger_img_proxy/AEn0k_uTxXU_N68ekrX5J7ZWyQ44fUqf0kR-2_YVfdfVftUa9wLptj7WRs_oyLWaDq3SRVGvejKslGuzWbZPVKnvvOuG_YuC11-clmGsMaTuip8Epmcm-4Jr3Dp-yoqOmnVfW8K8RIu9F2Rbl3Dg8F1F=s0-d)
![[image]](https://lh3.googleusercontent.com/blogger_img_proxy/AEn0k_t2JLQXbDxQWMFxrR33onBlIz7rlBsjRaNKE0ElffEjr3b75-tr3o8c1mtLwrTxPGBMUHFf7peL5ekSf21aLp4kDwGmPCIHVbfDBn4luu3EhzSQ0_AHqC1tLRGz2Mw5ML2XzSnZ1GAYcykXjlXZLA=s0-d)
![[image]](https://lh3.googleusercontent.com/blogger_img_proxy/AEn0k_siXy08zZimiL2KbV9C9S2NyNLXpI6GuTSasi-zdtLfNfyBlFYzwabNnY8fwuov9L33_qmZvkGSgISP7C5kMmhAHRcYMEBd9CiBNyrs2P3YKr1eHfyAyaYRqynwU6oZEdNydqdGF2gCl3pt46Kc=s0-d)
![[image]](https://lh3.googleusercontent.com/blogger_img_proxy/AEn0k_ugwE2ZtXXL6U1xr-gxUkdHosU9D_mAxmXsmsjPuWfvWX57MraA3eK13suoPogsz6-AtoiF5iJ1Yrml3vqiRdGr26wbwXvHdUtuNIqHZxZJVnUPSFSF0Iclu2CIhfjTcrQNUBromQfOQKphfKAt7N3H=s0-d)
![[image]](https://lh3.googleusercontent.com/blogger_img_proxy/AEn0k_sa-90gyqTkkmHI8OxOPPMsqrT0v8iyPWiBZjJQpARMSqxNaf6Fi8bHlOtDAtqFUnjyoSydbTAH-il7M47Xq47JiODaOjyBagURRFU682grp8xmxcPEko47cLFW_-4Xj1a2yWrglHqTtQYU5lteWw=s0-d)
![[image]](https://lh3.googleusercontent.com/blogger_img_proxy/AEn0k_tx-lz01aHHZl8jYIClLlYArwOYwvGJV-DBZLq06oDHOhAttQ0x5RfwAztGZV1d5bDnufTGVYOLqz9td9yTjg2s_MSGfa3r1UL_EjcbBhcb7NXKFiIaBLEatIDB1OZmhWXyNyBBKPm3MAvxL51b=s0-d)
![[image]](https://lh3.googleusercontent.com/blogger_img_proxy/AEn0k_sEHJJ2mSTPoAewt7DwvWWtb7CDyu5NLMEOSjp9Dcyf1MsDIBRyTmwy3nyXuKUeJduxKjL72vbKrksvRPm-tk7UCqbPDSpSCW2EU_kgfuUFlSIxhSc1GG-BbJXYFabKHxZfJtj1zkUeMxCGyLrqIQ=s0-d)
![[image]](https://lh3.googleusercontent.com/blogger_img_proxy/AEn0k_vlal5Va36WtwdAVnp4LAkGaH0ztjke968k3neD-ME_z8q4JMJKyScWhfqnO9HaWfNbgod2hDM-BzLb4Azgh4qQ7As4i2T1y0n3xhoCk8rvUrAYaUTxDKlhXjT7ebFLS9oNc32nMPwbAFjYyMSylA=s0-d)
![[image]](https://lh3.googleusercontent.com/blogger_img_proxy/AEn0k_tqwPftpxaecQ7ssTy9W5XXnnlrWq3aAPsEsXFjs1IhDKx262T9JjbE8IFSlaU_rCmkOUcWyMfFdPp9Kh8H1O2Jwav01D73hhkvz1Ix3BTtFKBSzXL_OK2zv3e5Z4TA4z_zL-wkKkggHmAOurOx=s0-d)
![[image]](https://lh3.googleusercontent.com/blogger_img_proxy/AEn0k_uIgFN_NjJDsrVsJ2x1ms85LZPLTGRo0gKpeKmDZMPoCMMrkI9y30U044ZQaUbNyuk4B6PtrmD0pF6kdQPaHsynAssvTy2lCF1kIIK4ifHPOm1A9MEje4JUjU-D79rzklPoy8utCfvAkE2y3NrooQ=s0-d)
![[image]](https://lh3.googleusercontent.com/blogger_img_proxy/AEn0k_t-P0JlEDB7x5BIVeAMbTcb38ZRZF2nO0w2TWR6qmaKt6mJHiHNnKg_sfGutEaxaBgJc_JjsGJPfHj-Q_E0xLHGscU-StAd_bX5fiqxxfkMfuSqjgmcDek_KUQxZT_SqCRvAgSRHtGyDbu5rMGFSg=s0-d)