I interrupted the making of the gussets (frame corner pieces) to make a drawing of the view of the keel, sheer (outside deck) line and the chine (where the bottom of the side panel meets the bottom panel).
I first drew a line, 2 inches inside parallel to the edge of the paper. This becomes the centerline of the boat. I then marked out the position of each frame along the centerline. Taking my carpenter's square, I then extended a line out from center representing the frame.
Once all the frame had been drawn, I marked the position on each frame where the keel, chine and deck positions crossed it. I then took the long wood strip and drew a line to show where each crossed the frame.

Chine line.

Deck line. Note the chine line just inside the deck line.
There is not a lot of distance between the deck and chine line because the sides of the boat are nearly vertical, or "hard chined". It would be "softer chined" if the sides extended out at more of an angle. A hard chined boat is "stiffer" and will not heel over as far.
I will use this drawing to obtain the angles to cut into the corner and top of each frame for the long pieces of 3/4" x 1-1/2" "stringers" (long pieces of wood) that will run from the transom (back) to the bow (front) of the boat.
Spent most of the past 2 days setting the proper angles and lengths for each frame. I want a nice, tight fit to help everything form into a strong whole when it is under the strain of a strong wind.
The most important tool in the operation is what I call a bevel finder. It sets to an angle with a thumb screw to hold it. I can then set the protractor on the table saw and cut very precise angles. Here is a picture of frame #2, just where the boat begins to widen.

The next step is to begin to add pieces to hold the frames together called gussets and floors. These will provide reinforcement and rigidity to the frame as well as strength and a place to "land" and secure other parts.
My order that I placed Friday from Jamestown Distributors arrived Monday morning. Pretty darn quick!
I bought lumber on Monday from the local lumber yard, including my first panel of 3/8" thick marine plywood. A standard 4' x 8' panel runs $69 here.
I have to use it to make sure that the plys do not separate, like they might with exterior plywood. Also, there are no voids in marine plywood, no open gaps.
The longest piece was a 1x8" x 16' long piece of pine that I will use to make 1-1/2" wide stringers that will be attached to the corners of the frame. That will come later but I also will cut a thin strip from it to use as a batten and help make sure the curves line up correctly between the frames as I erect them.
I began ripping the boards into 2-1/2" wide pieces this morning, until I had 86 linear feet, this is supposed to be enough to supply wood for all the frames according to the designer, but I am not so sure.

After the frame wood was ripped, I began to cut pieces to the rough sizes I will need for each frame. I cut 3 of the smaller frames today and they alone used nearly 36 linear feet of frame material!

Frame #2
At this rate, with 8 more even larger ones to go, I am going to use a lot more that 86 linear feet! I see more ripping in my immediate future.

Frame #3
It felt good to finally begin the building process. There is a lot to do before I can begin to assemble the frames into their final form but stick with me and you will see how it gets done!
I figure I will be done drawing the frames this Sunday, April 12th. On Monday, I will buy the first wood that I will need to cut on my table saw. About 80 linear feet of 1" x 2-1/2" wide pine that will make up the frames.
I am figuring on only working a couple hours a day in the morning before the temperature gets really hot. It will take the whole two hours to cut the frames from the lumber but the blade is still sharp even after using it to build 3 other boats!
So, in anticipation of the frame construction, I ordered Silicone Bronze screws and Ring Nails today from Jamestown Distributors in Rhode Island. The silicone bronze resists salt water much better than regular brass or galvanized, which is what used to be used in the past. The ring nails are popular for wood boat building because once the are driven into the wood, they are the devil to get out.
Ring nails are used to secure house sub- flooring so that the floor does not squeak.
The screws use a variation of the Philips head, the familiar cross on the top of the screw's head. It is called a Frearson head and requires its own special bit. If you try to use a standard Phillips screwdriver, you will "gall" the area where you insert the screwdriver tip, rendering it useless and nearly impossible to remove, destroying the $.35 screw in the process. I drive them into the wood using a bit brace to make sure I don't waste them. A bit brace is an old shipbuilder's tool and getting harder to find these days.

Bit Brace
It allows for better control of the torque you apply to the screw. You push your body against the round end to help push the lubricated screw into the already drilled pilot hole.
I also ordered a water resistant powdered glue that I will use to help make all my wood to wood attachments more secure. It is an older type of glue but nothing better, IMHO, has been invented for boat building. It gets mixed with water in a very specific ratio to achieve its best consistency and adherence. More on that later.
My hope is to keep sharing some of what I have learned about building a wood sail boat. Progress should be steady so check back every week to see!
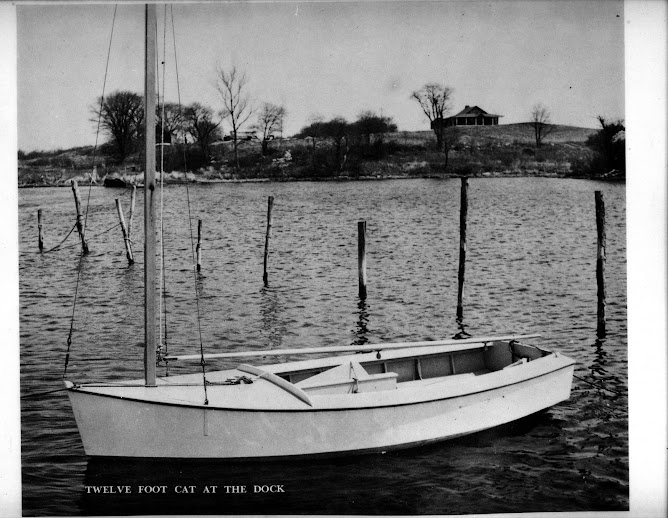
I had been wanting to build another sailboat and decided to start another. The one will be 12 feet long and a variation on a traditional Cat boat, a single sail, wide and stable boat.
The plan having been selected, the first step is to draw full size drawings of the side panel and the frames (ribs) of the boat. These drawings will serve to provide the dimensions and angles for each frame piece. This will be shown later.
36" Kraft paper, a 48" Aluminum ruler, carpenters pencil, carpenter's square and a good eraser are the tools needed.
The work is done on the floor of the living room and starts with frame #1 and finishes with #11, the transom or back piece of the hull.  After the frames are all done, the side view will be drawn to full size.
When that is completed, the real work begins.